Stamp Sets
Colorful Seasons 143726
Itty Bitty Christmas 150513
Ink:
Seaside Spray 150085
Pretty Peacock 150083
Paper:
Seaside Spray 150883
Shimmery White 101910
Scrap White
Accessories :
Tin Tile 3D Embossing Folder 151801
Seasonal Layers Dies 143751
Aqua Painter 103954
White Polka Dot Ribbon 146912
White Baker’s Twine 124262
Banner Triple Punch 138292 (optional)
Stampin’ Dimensionals 104430
SNAIL Adhesive 104332
Multipurpose Liquid Glue 110755
Instructions:
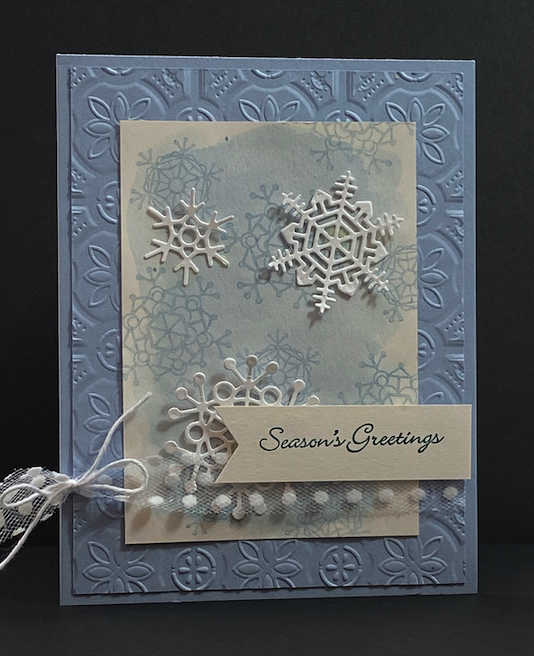
- Cut Seaside Spray card stock 5-1/2” 8-1/2” and score at 4-1/4” for the card base. Cut one piece of Seaside Spray at 4” x 5-1/4”. Cut one piece of Shimmery White at 3” x 4-1/4”.
- Run the smaller Seaside Spray piece through your embossing machine with Tin Tile embossing folder.
- Using the Aqua Painter, dampen the Shimmery White card stock with water. Then pick up some Seaside Spray ink with Aqua Painter and apply to water to get a watercolor wash background. Allow to dry.
- Once the watercolor wash is dry, stamp snowflakes from Colorful Seasons stamp set. You will want to stamp off (a.k.a. stamp on scrap first, then stamp on card stock) to get a softer snowflake look.
- Adhere Shimmery White snowflake piece to Tin Tile piece. If using Snail Adhesive, be sure to use enough to get a good stick (the embossed piece sometimes prevents good sticking). Wrap 12” of the White Polka Dot ribbon around the bottom of the two pieces and tie together with the White Baker’s Twine. Adhere this piece to Seaside Spray card base (again, be sure to stick well with either
Snail Adhesive or Multipurpose Liquid Glue).
- Cut out 3 snowflakes, one of each size, from Seasonal Layers Dies with scrap white card stock. Glue snowflakes onto watercolor wash background.
- Stamp your choice of greeting onto scrap piece of Shimmery White card stock with Pretty Peacock ink. Use either scissors or Banner Triple punch to flag the edge. Apply to card with Dimensionals.